
Ultrawall guide
Overhead and Lumber Storage: Ceiling Racks, Joists and Wall Arms
What belongs on the ceiling and the high wall: tote racks that hang by the rim, finding joists, what the building code says about ceiling loads, lumber arms and heavy shelves.
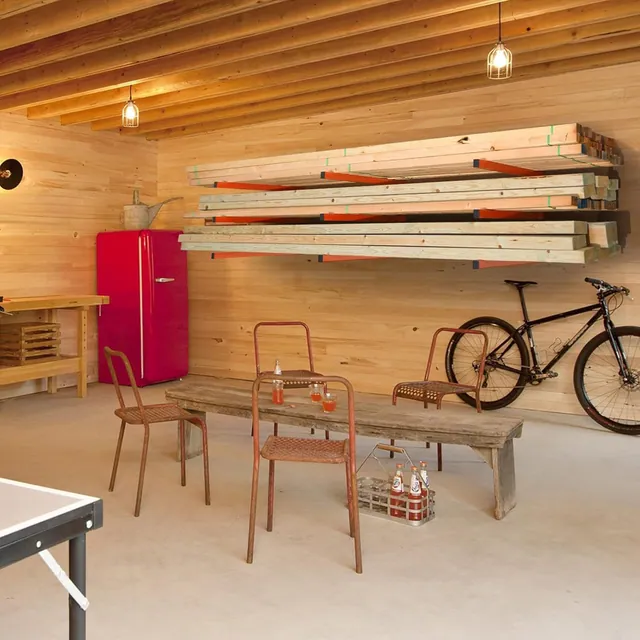
Most garages run out of floor long before they run out of space. Look up and the room is still there: the ceiling over the hood of the car, and the band of wall between the top of your reach and the ceiling. That space suits the things you need a few times a year, the long things that never fit on a shelf, and the boxes that otherwise stack up in a corner.
- 4layers of a garage, floor to ceiling
- 3ceiling tote racks
- 3lumber arm designs
This is the part of the garage where planning pays the most and a mistake costs the most. A tote on the floor that falls over makes a mess. A tote on the ceiling that falls makes a dent in the car, or worse. So before the racks, a look at what belongs up there, what the ceiling is made of, and what the numbers on a ceiling rack do and do not tell you.
What belongs up high, and what does not
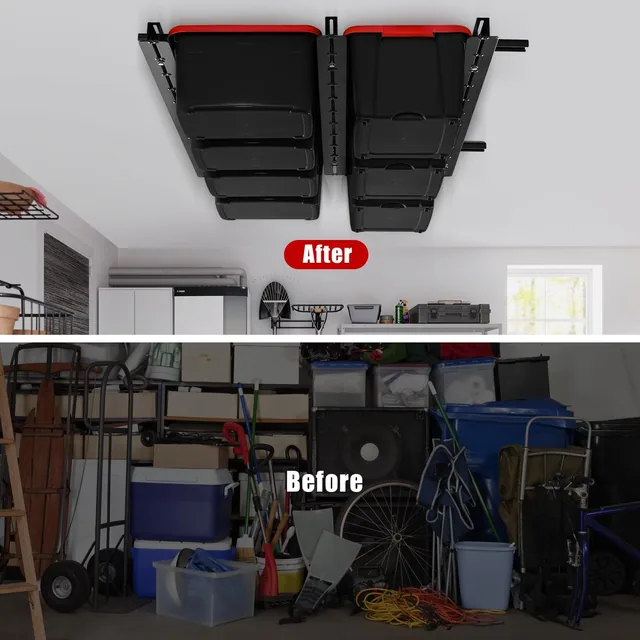
The rule is simple. The higher something lives, the less often you should need it and the less it should weigh. Holiday decorations, camping gear, winter clothes, the baby things kept for a younger cousin, spare tiles from the kitchen job: those go up. Anything you reach for weekly, anything heavy, and anything that would hurt someone if it dropped stays lower, on wall shelves within easy reach.
Long things are the exception. Boards, pipe, trim, conduit and offcuts are light for their size but impossible to store on a shelf. They belong on lumber arms high on the wall, where their length runs along the wall instead of across the floor.
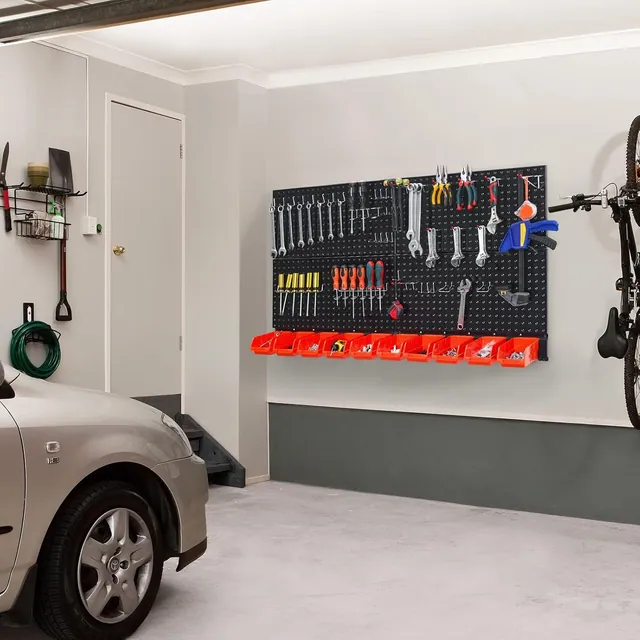
Before anything goes up, sort it into closed totes with labels on the ends. A label you can read from below saves you from taking down three totes to find the one with the extension cords. Clear totes help too, but labels do more.
How ceiling bin racks work
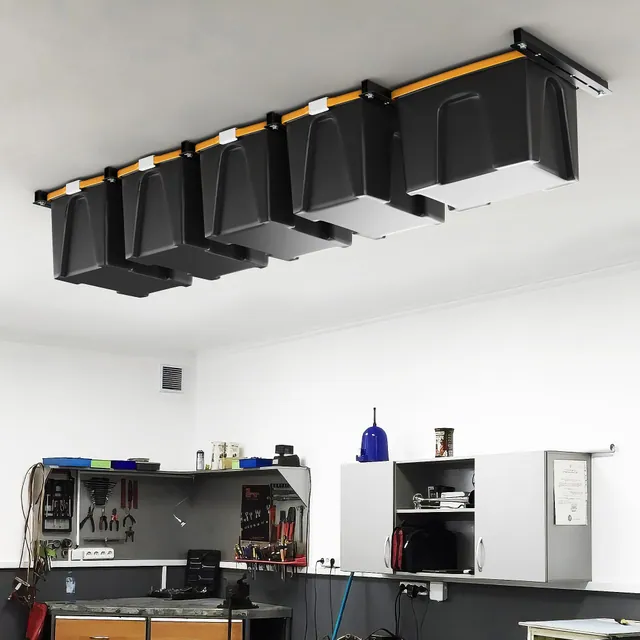
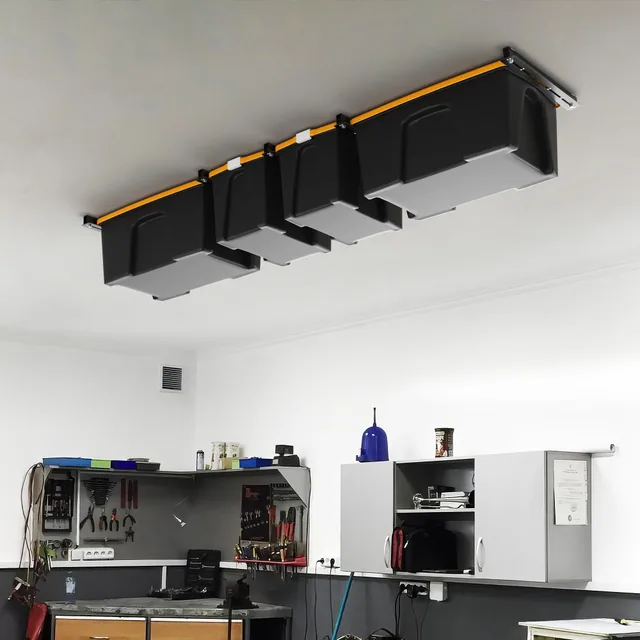
Our ceiling racks do not use a platform. Instead, pairs of steel rails hang from the ceiling joists, and each tote slides in between them and hangs by its rim. The tote itself is the shelf. You pull one out by the handle, lift it down, and slide it back in the same way.
That design has two consequences. First, it only works with totes that have a rim. A box without a lip, or a soft bag, will not hang.
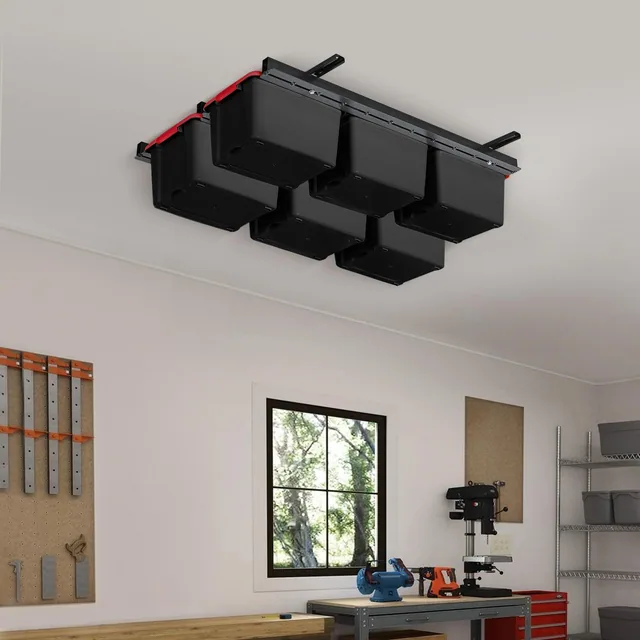
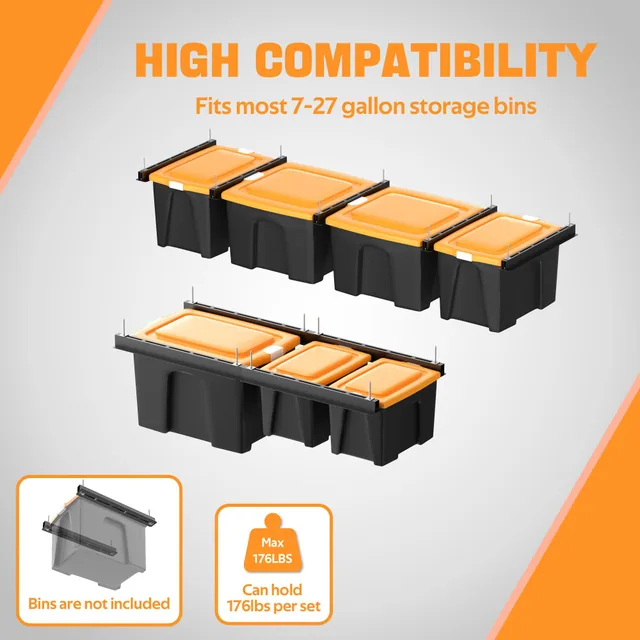
Second, the rails have to be set to the width of the totes you own. The Adjustable Overhead Bin Rack, 8 Bins adjusts its width for most tote sizes and holds up to 8 totes, rated to 330 pounds per set. The 26 in Ceiling Bin Rack is sized for bins from 7 to 27 gallons and comes in sets for four or five totes, rated to 176 pounds per set.
The rails join end to end with T-shaped connectors, so a row can grow. Buy one set, live with it for a season, and add a second if the first fills. The Overhead Bin Rack, 6 Bins also adjusts its width, takes six totes, and goes up with two screws per bracket.
| Point | Rack | Totes | Rating | Joist spacing | Price |
|---|---|---|---|---|---|
| Adjustable Overhead Bin Rack, 8 Bins | 8 | 330 lb per set | Into joists | $99.99 | |
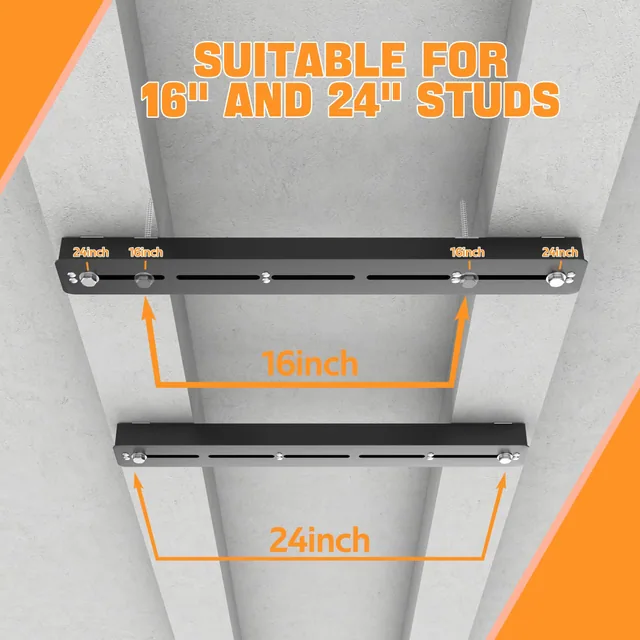
| 26 in Ceiling Bin Rack | 4–5 | 176 lb per set | 16 or 24 in | from $55.99 | |
| Overhead Bin Rack, 6 Bins | 6 | 176 lb per rack | Into joists | $89.99 |
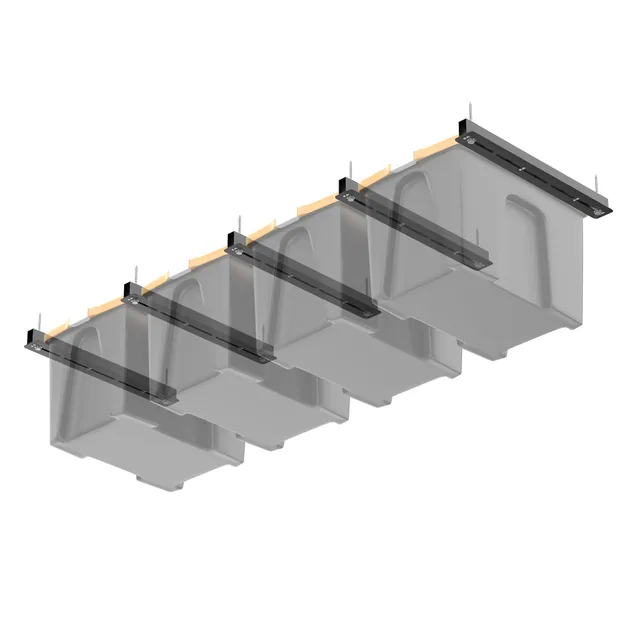
Ultrawall 26 in Ceiling Bin Rack
Rails for four or five totes from 7 to 27 gallons, made for joists 16 or 24 inches apart.
Find the joists first
Every ceiling rack we make screws into the joists, the wooden beams that carry the ceiling. Drywall alone holds nothing like the weight of a full tote. The rack has to hang from wood.
A stud finder works on a ceiling just as it does on a wall. Run it across the ceiling at right angles to the direction you think the joists run, mark each edge it finds, and mark the center between the edges. Do it in two or three places along the run, so you know the joists are straight and not doubled or interrupted. Joists are often 16 or 24 inches apart, which is the spacing our 26 inch rails are made for.
- 16 or 24 injoist spacing for the 26 in rails
- 1small test hole per joist
- 2people for a ceiling job
Then look at everything else on the ceiling. The garage door has a track on each side and, when it opens, the door itself slides up under the ceiling. The opener hangs from a rail down the middle. There are lights, and sometimes a heater or an attic hatch. A tote rack that blocks the door, the opener or the hatch is a rack in the wrong place. Open the door fully, look at where it sits, and keep the racks clear of it with room to spare.
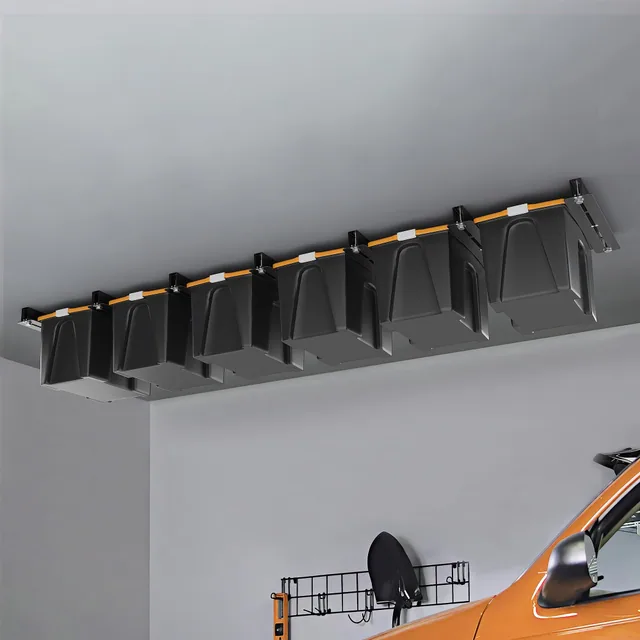
Finally, measure down. From the ceiling to the bottom of a hanging tote is the rail height plus the tote height. From the floor to the top of your vehicle, with the roof rails and any box on top, is the other number. The gap between them is the clearance, and it should be generous. A tote that clears a car by an inch is a tote that meets the car on the day the car parks a little further in.
Screw ceiling racks only into joists, two screws per bracket where the instructions say so, and keep each set within its rating. If the space above the garage is a room, or the ceiling is framed with trusses, ask a builder before you hang anything heavy from it.
Finding joists through a finished ceiling
A finished garage ceiling hides its joists behind drywall, but they leave clues. Drywall screws run in lines along the joists, and a strong magnet slid across the ceiling stops on each screw head. A row of stops is a joist. Light fixtures and smoke alarms are often fixed to a joist or right beside one. On an unfinished ceiling the joists are in plain view, which makes the job easier still.
Confirm each joist before you commit to it. Drill a small test hole at the mark. If the bit meets solid wood after the drywall, you are on the joist. If it pushes through into air, move over and try again, and fill the test hole later.
What you need
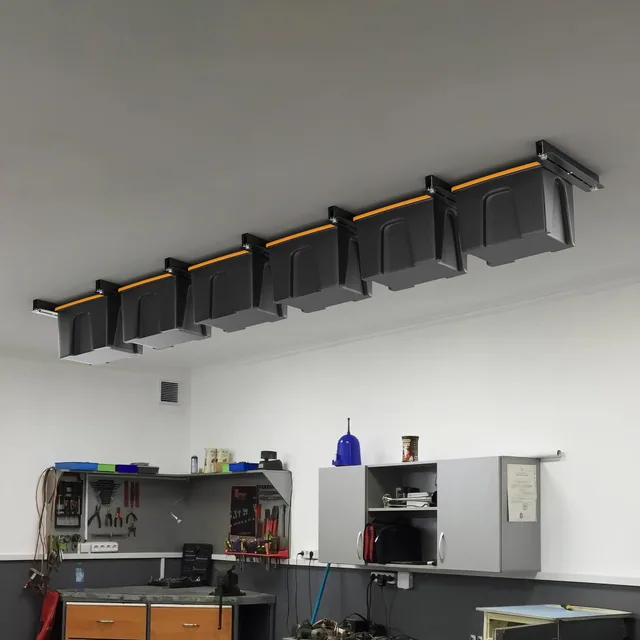
The job takes a stud finder or a magnet, a pencil, a tape measure, a drill with a bit sized for the screws in the box, and a sturdy step ladder. A second person is not optional on a ceiling. Holding a rail overhead while you drive its screws is hard work for one, and a helper below can check that the rails are level and parallel.
What a ceiling can carry, in plain numbers
A rack’s rating tells you what the rack can hold. It does not tell you what your ceiling can hold. Those are different questions, and the second one depends on how the house was built.
- 10 psfattics without storage, IRC Table R301.5
- 20 psfattics with limited storage
- 17 psfour worked example under a full set
The International Residential Code, published by the International Code Council, sets out the loads that house framing is designed for. Its chapter on building planning starts from a broad rule.
“Buildings and structures, and parts thereof, shall be constructed to safely support all loads, including dead loads, live loads, roof loads, flood loads, snow loads, wind loads and seismic loads as prescribed by this code.”
From section R301.1 of the 2021 code: International Code Council, 2021 International Residential Code, Chapter 3: Building Planning, read October 26, 2026.
For the space above a garage ceiling, the relevant numbers are the live loads, the weight of people and things that come and go, as opposed to the weight of the structure itself.
“The minimum uniformly distributed live load shall be as provided in Table R301.5.”
Section R301.5 sets them out in a table: International Code Council, 2021 International Residential Code, Chapter 3: Building Planning, read October 26, 2026.
That table lists 10 pounds per square foot for uninhabitable attics without storage and 20 pounds per square foot for uninhabitable attics with limited storage. A footnote defines the first kind by the space under the roof.
“Uninhabitable attics without storage are those where the clear height between joists and rafters is not more than 42 inches”
From the footnote to Table R301.5: International Code Council, 2021 International Residential Code, Chapter 3: Building Planning, read October 26, 2026.
Those are minimum design loads for the floor of an attic, spread over its whole area. They are not a promise about any particular ceiling, and many ceilings are built stronger. But they give a sense of scale.
Here is a rough example with numbers you can check. Say a full set of our adjustable rack hangs in a row about 8 feet long and 2.5 feet deep, which is 20 square feet of ceiling. At its rating of 330 pounds, that works out to about 17 pounds per square foot over the patch it hangs from.
That is close to the 20 pounds per square foot the code sets as a minimum for attics with limited storage, and well above the 10 for attics without storage. It does not mean the ceiling will fail.
It means a fully loaded rack asks real work of the joists, and that you should know what your ceiling was built for before you fill every rack to its rating. Spreading the load helps: two half-full racks over different joists are easier on a ceiling than one rack loaded to the limit.
- 330 lba full adjustable set
- 20 sq ftof ceiling in the example
- about 17 lbper square foot
If you do not know what your ceiling was built for, keep the ceiling for light things and put the heavy ones on wall shelves, where the load goes into the wall studs and down to the slab. A builder who has seen the framing can tell you more than any rating on a box.
When the ceiling is the wrong place
Some ceilings should carry nothing heavier than a light fixture. If there is a bedroom or a bonus room above the garage, the joists already carry a floor, furniture and people, and adding hanging storage asks them to do more than they were planned for. If the roof is framed with trusses, the thin lower members were sized for a ceiling and insulation, not for storage hanging from them. In both cases, ask a builder before you drill.
Look for warning signs too. A ceiling that already sags, drywall seams that have cracked along a line, or nails popping out of the ceiling all say the framing is working hard. Those ceilings are a place for nothing at all until someone has looked at them.
Living space above the garage, trusses, a sagging ceiling or cracked seams: ask a builder before you hang anything heavy.
And some garages are simply too low. If the clearance under a hanging tote and over your car is a few inches, a rack on the wall above the hood is a better choice, and a heavy shelf at the back of the garage does the same job without the risk.
Loading the overhead racks
Load from the light end of your stuff. Holiday wreaths, sleeping bags, pool toys and empty suitcases are ideal. Books, tools, paint and anything in glass belong elsewhere.
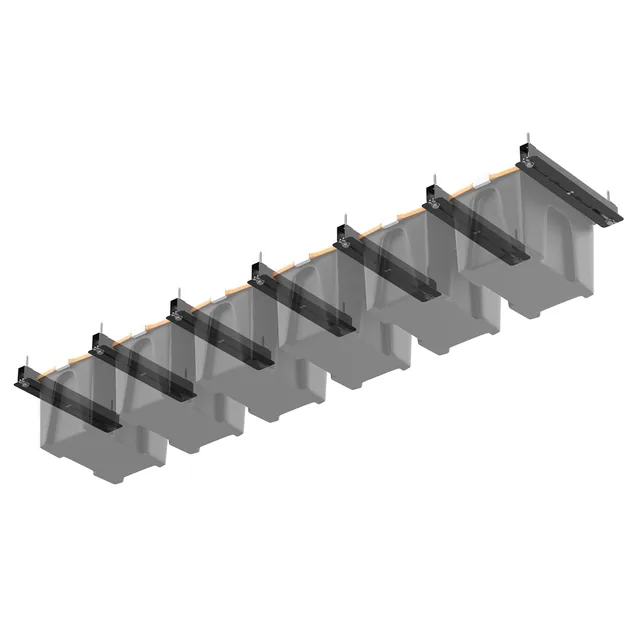
Ultrawall Overhead Bin Rack, 6 Bins
Adjustable width for six totes, 176 pounds per rack, two screws per bracket.
Weigh a tote before it goes up if you are unsure. The bathroom scale trick works here too: stand on the scale with the tote and without it. Write the weight on the label. Add up a row and compare it with the rating of the set. The rating is per set, not per tote, so a set of five totes rated at 176 pounds averages about 35 pounds per tote.
Use a sturdy step ladder, not a chair, and have someone hand the totes up. Slide each tote fully onto the rails and check that both sides of its rim sit on the rails before you let go. Put the totes you open most at the end nearest the ladder spot.
Choosing totes for a ceiling rack
The rack is only half of the system. The totes are the other half, and the wrong totes make a good rack useless. Three things matter: the rim, the size and the lid.
The rim carries everything. It should be a solid, continuous lip that sticks out at least as far as the rail’s ledge, with no gaps at the corners. Totes with handles molded into the rim work well, because you lift them out by the same lip that holds them. Totes with a soft or tapered rim can twist out of the rails when they are full.
- Rima solid lip all the way round
- Sizeone tote width per rail spacing
- Lidclips shut, keeps dust out
Size is about the rails. Our 26 inch rack is sized for 7 to 27 gallon totes, and the adjustable racks change their width to suit most sizes, but one rail spacing fits one tote width. Buying a run of identical totes, all from the same brand and line, keeps every slot interchangeable. Mixed totes mean resetting the rails each time a tote changes.
Lids should clip shut. A tote hanging above the car with a loose lid is a tote that drops its contents the first time someone pulls it out at an angle. Clip-on lids also keep out the dust that every garage makes.
Price per tote slot, like price per bike, is a fair way to compare racks of different sizes. The table divides each rack’s current price by the number of totes its largest version holds.
| Point | Rack | Totes | Price | Per tote |
|---|---|---|---|---|
| 26 in Ceiling Bin Rack | 5 | $59.99 | $12.00 | |
| Adjustable Overhead Bin Rack, 8 Bins | 8 | $99.99 | $12.50 | |
| Overhead Bin Rack, 6 Bins | 6 | $89.99 | $15.00 |
Rotating the seasons
Ceiling storage works best as part of a rotation. In the fall, the summer things go up: pool toys, camping gear, the fans. The winter things come down: boots, sleds, heaters, holiday lights. In the spring the swap runs the other way. Each move is one trip up the ladder per tote, and the shelf at head height takes whatever is on its way between the two.
Label the totes by season as well as by contents, and keep each season’s totes together on the ceiling. Then the spring swap is one row, not a hunt across three racks.
Lumber arms for boards, pipe and trim
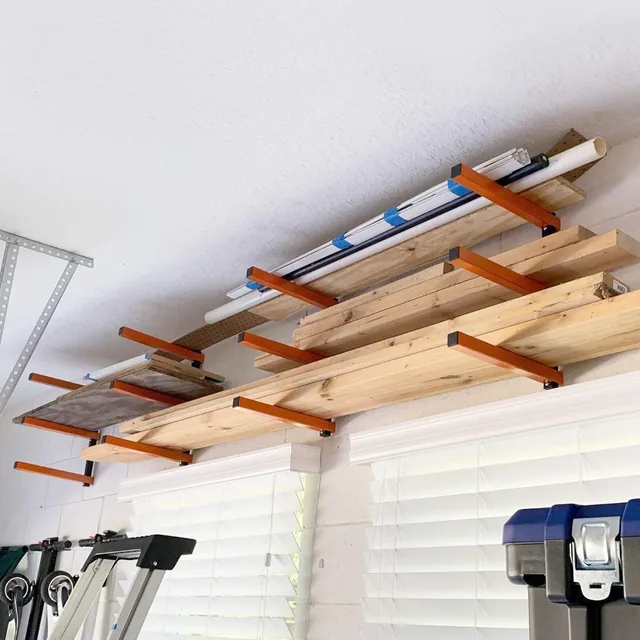
Long stock is the other thing that eats garage floor. A pile of boards leaning in a corner tips over, and the ones at the back warp because they are never moved. Wall arms hold them flat, sorted by size, and up out of the way.
Our 3-Level Lumber Storage Rack has three levels on each arm, rated to 330 pounds per level, in orange or black, and comes in packs of two, three or four arms. The E-Shape Lumber Rack, 4 Pack is a welded E-shaped arm that arrives assembled, four to a box, rated to 220 pounds per level and 660 pounds per arm. The two-pack of the same arm suits a short run of trim.
| Point | Rack | Levels | Rating | Arms in the box | Price |
|---|---|---|---|---|---|
| 3-Level Lumber Storage Rack | 3 | 330 lb per level | 2–4 arms | from $35.99 | |
| E-Shape Lumber Rack, 4 Pack | 3 | 220 lb per level | 4 arms | from $44.99 | |
| E-Shape Lumber Rack, 2 Pack | 3 | 220 lb per level | 2 arms | $29.99 |
How many arms a board needs depends on the board. A long, thin piece of trim sags between supports much more than a thick stud. More arms mean shorter spans and straighter boards. A good rule of thumb is to put arms closer together for thin or flexible stock and further apart for stiff, heavy lumber, and to let no board hang far past the last arm.
Mount the arms into studs, with the arms level with one another, so a board rests on every arm at once. A board that touches only two arms out of four is carried by two. A string line or a long level across the arms before you tighten the last screws saves that problem.
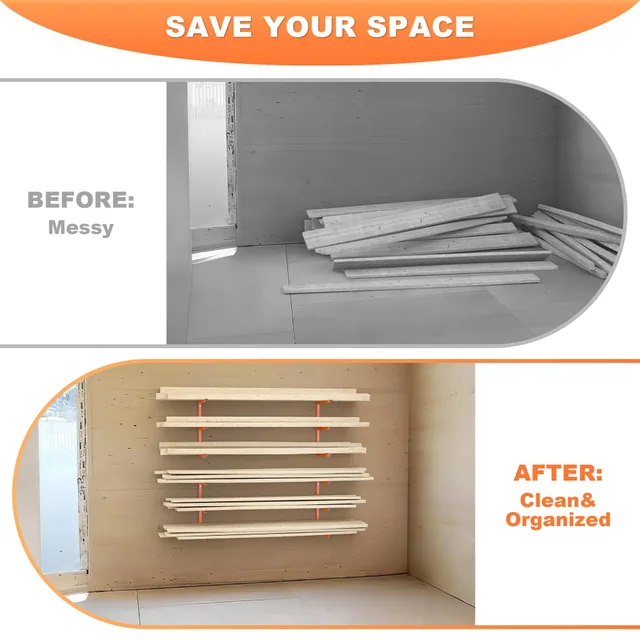
Lumber arms take more than lumber. They also carry pipe, flooring, side panels, ladders, folding chairs and skis. Sheet goods are the exception. A sheet of plywood rests badly on arms and is better stored upright in a floor rack or flat on the floor.
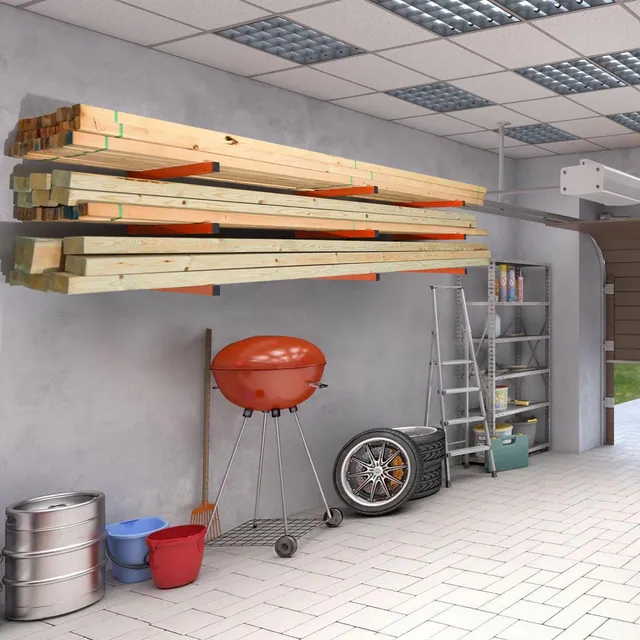
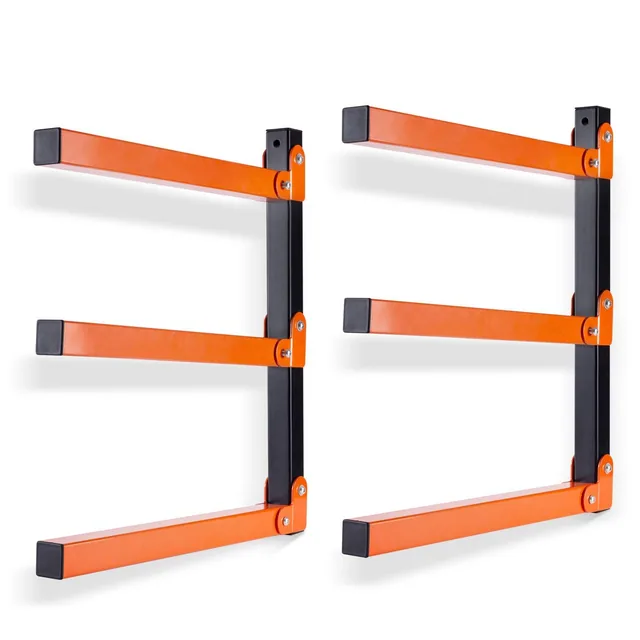
Ultrawall 3-Level Lumber Storage Rack
Three levels per arm, 330 pounds per level, in packs of two to four arms.
Sort the boards before they go up. Put the longest stock on the top level, where it has the most clear wall, and the short offcuts on the bottom, where you can see them. Keep one level for each kind of material, such as framing lumber, hardwood and trim, and a project will start with the right board instead of with a search.
Leave room to slide boards in and out. Lumber arms hold stock from the front, so a board at the back of a level is reached by moving the ones in front of it. Stack each level no deeper than you are willing to unload.
Ladders, chairs and odd shapes
- 3levels per arm
- 220–330 lbper level, by model
- 2–4arms per box
Lumber arms are good at long things that are not lumber. A step ladder lies flat across two arms with its feet against the wall. Folding chairs stack on a level like boards. Skis, snowboards and a kayak paddle rest on the top level, where they are out of reach of children and out of the way of the car door. Both of our arm designs are made to hold ladders and folding chairs as well.
Odd shapes need more care than boards, because they do not sit flat. Rest the heaviest point of the item on an arm, not between arms, and check that nothing hangs over the front edge of a level where a head can meet it. A ladder stored on arms above a walkway should sit high enough that nobody has to duck.
Heavy shelves: the middle layer
- 400 lbper heavy-duty shelf
- 220 lbper 4 ft shelf
- 550 lbper pair of folding brackets
Between the floor and the ceiling sits the band most garages use badly: the wall above head height, too high for pegboard and too low for the ceiling. Heavy wall shelves turn it into storage for the things that are too heavy for the ceiling and too bulky for a pegboard.
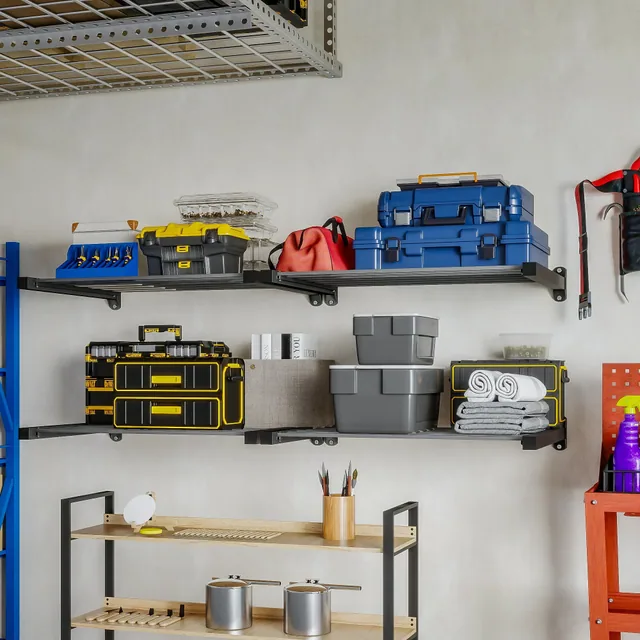
Our Heavy-Duty Garage Wall Shelves, 2 Pack are steel-tube shelves on triangular brackets, rated to 400 pounds each and 800 pounds for the pair, in 33, 36 and 48 inch widths. They are made for wood studs 16 or 24 inches apart, and the rating assumes the brackets go into them. The 2 × 4 ft Wall Shelves with Hooks, 2 Pack run 4 feet each, carry 220 pounds per shelf, and have four hooks underneath for a hose, cords or a broom.
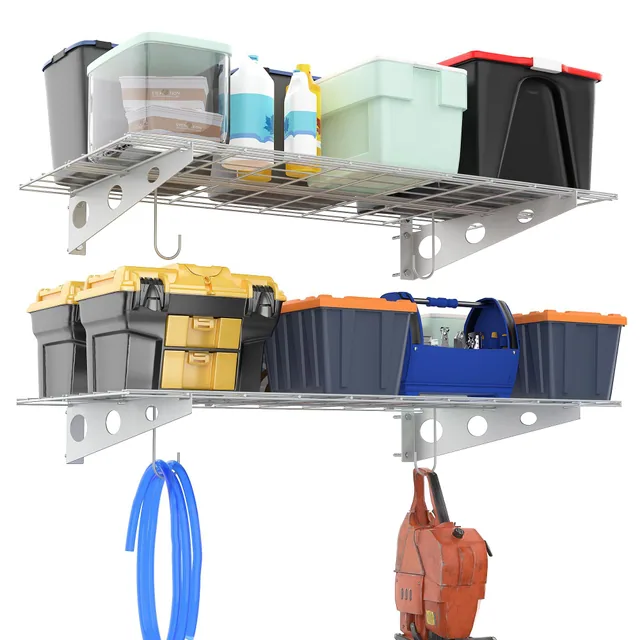
Shelves are where the heavy totes belong. Tires, full paint boxes, a bag of fertilizer and the toolbox you use once a month are all better on a shelf at head height than on a ceiling rail. The load goes down through the brackets into the studs, and from there to the floor.
If part of the wall needs to be a work surface some of the time, a pair of our 24 inch folding brackets carries a board as a bench or a deep shelf and folds to less than 4 inches off the wall. A pair is rated to 550 pounds.
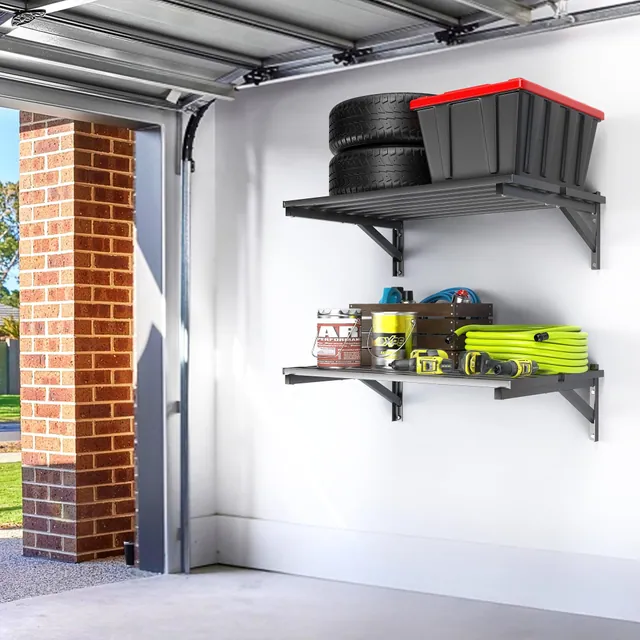
If something is too heavy for any shelf you own, it belongs on the floor, ideally on a low platform or a rolling stand, where nothing can fall from it. A floor is the one place in the garage with no rating at all.
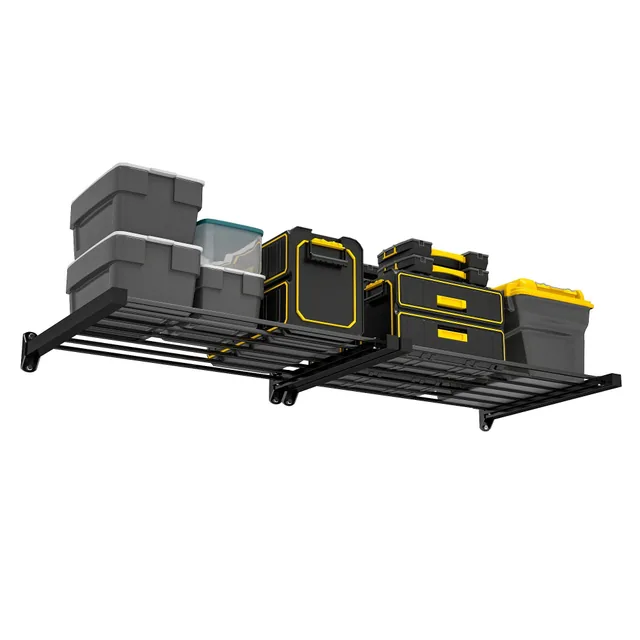
Ultrawall Heavy-Duty Garage Wall Shelves, 2 Pack
Two steel-tube shelves on triangular brackets, 400 pounds per shelf, for studs 16 or 24 inches apart.
Plan the garage in layers
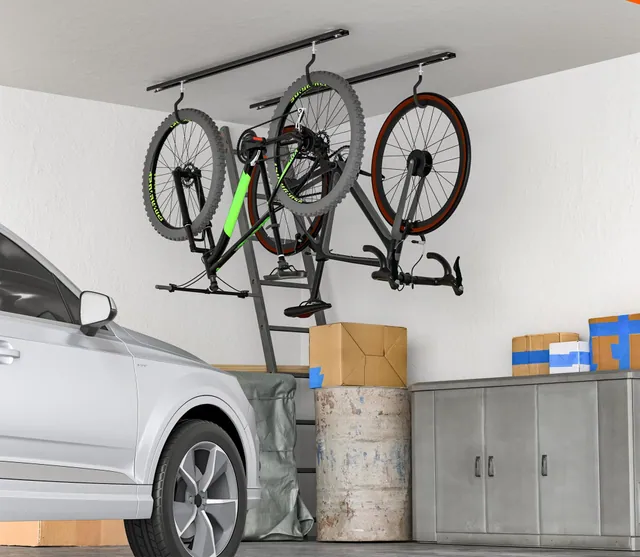
It helps to think of the garage as four layers, from the floor up. The floor is for the car, the bench and anything on wheels. The reach band, from about waist height to the top of your reach, is for things you use every week: pegboard, tool rails, bikes on hooks. The high wall above it is for heavy shelves and lumber arms. The ceiling is for light totes and, if the height allows, bikes on a track.
- Floorcar, bench, anything on wheels
- Reach bandpegboard, rails, bikes
- Ceilinglight, seasonal totes
Sort your things into those layers before you buy anything. You will usually find that the floor clutter is mostly reach-band things with nowhere to go, and that the ceiling needs far less than you thought. The order of work follows from that: clear the reach band first, then the high wall, then the ceiling.
Leave a clear path from the door to the bench and to the ladder spot. A garage where you have to move a bike to reach a tote will drift back to a pile on the floor.
Before you order
Six questions decide what goes where. What do I need only a few times a year, and how much does it weigh? Which way do the ceiling joists run, and how far apart are they? Where does the garage door sit when it is open, and where is the opener? What is the clearance from the ceiling to the roof of the car? What long stock do I keep, and how long is the longest piece? Which wall has studs I can reach for heavy shelves?
- 6questions before you order
- 2departments: Overhead & Lumber, Shelves
- 15designs between them
With those answers written down, the order is short. Ceiling racks for the light, seasonal totes. Lumber arms for long stock along one wall. Heavy shelves for the weight in between. All of them are in two departments, and search finds a rack by tote size, by joist spacing or by the model number on the box.
Sources
- International Code Council: 2021 International Residential Code, Chapter 3: Building Planning, read October 26, 2026.